Are you a baking enthusiast looking to take your chocolate creations to the next level? Look no further than these pro tips for baking with chocolate. With these simple yet effective techniques, you can elevate your baked goods from ordinary to extraordinary. Learn how to properly melt chocolate, choose the right type of chocolate for different recipes, and add a touch of elegance with decorative chocolate garnishes. Whether you’re a beginner or seasoned baker, these tips will help you master the art of baking with chocolate like a true pro. Get ready to impress your friends and family with decadent, chocolatey treats that are sure to delight.

Choosing the Right Chocolate
When it comes to baking with chocolate, choosing the right type of chocolate is essential for achieving the perfect flavor and texture in your treats. There are several types of chocolate that you can use, each with its own unique characteristics.
Types of Chocolate to Use
Dark Chocolate: Dark chocolate has a high percentage of cocoa solids and a less sweet taste. It is excellent for rich, decadent desserts and adds depth of flavor to your baked goods.
Milk Chocolate: Milk chocolate has a lower percentage of cocoa solids and is combined with milk powder or condensed milk. It has a smoother and sweeter taste, making it ideal for cookies and cakes.
White Chocolate: White chocolate does not contain cocoa solids but is made from cocoa butter, milk solids, and sugar. It has a creamy and sweet flavor, which pairs well with fruity desserts or can be used for decorative purposes.
Reading Chocolate Labels
To ensure you are selecting high-quality chocolate, it is important to read the labels carefully. Look for chocolates that contain a high percentage of cocoa solids, as this indicates a richer flavor. Avoid chocolates that contain additional fillers or additives.
When it comes to dark chocolate, opt for varieties that have at least 70% cocoa content for a robust flavor. For milk chocolate, choose ones that contain at least 40% cocoa content for a balanced taste. For white chocolate, seek out options with a higher percentage of cocoa butter for a more authentic flavor.
Quality of the Chocolate
The quality of the chocolate you use in your baking can make a significant difference in the final result. High-quality chocolates have a smooth and glossy appearance, a rich aroma, and a complex flavor profile. They melt more easily and evenly, resulting in a smoother texture in your baked goods.
When shopping for chocolate, consider purchasing from reputable brands known for their commitment to quality. Chocolates with a higher price tag often indicate better ingredients and craftsmanship. Additionally, it is a good idea to taste the chocolate before using it in your baking to ensure it has a pleasant flavor.
Prepping the Chocolate
Before you can start incorporating chocolate into your recipes, you need to prepare it properly. This involves chopping the chocolate into smaller pieces, melting it, and tempering it if necessary.
Chopping the Chocolate
To chop chocolate, start by using a sharp knife and a sturdy cutting board. Break the chocolate bar into smaller sections and then lay it flat on the cutting board. Hold the handle of the knife and press the blade down onto the chocolate, applying gentle pressure to break it into small, even pieces.
Alternatively, you can use a food processor or a grater to achieve finely chopped chocolate. This method is especially useful if you want to incorporate chocolate into batters or doughs more smoothly.
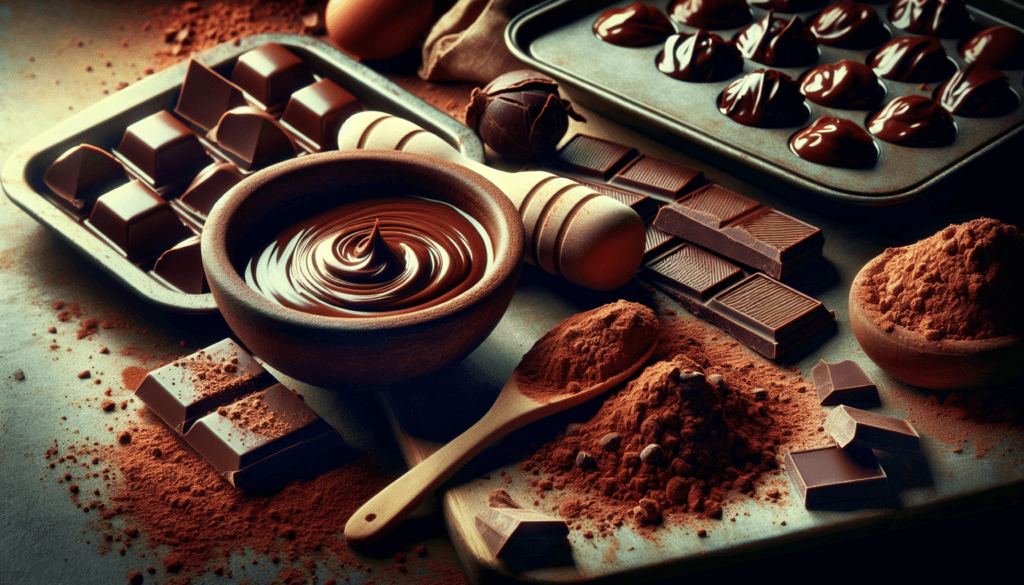
Melting the Chocolate
Melting chocolate is a delicate process that requires your full attention. There are a few different methods you can use, depending on your preference and the specific recipe you are following.
Double Boiler Method: This is the most recommended method for melting chocolate. Fill a saucepan with water and bring it to a simmer. Place a heatproof bowl on top of the saucepan, ensuring that the bottom of the bowl does not touch the water. Add the chopped chocolate to the bowl and stir occasionally until it is completely melted and smooth.
Microwave Method: If you’re short on time, you can also melt chocolate in the microwave. Place the chopped chocolate in a microwave-safe bowl and heat it in short bursts of 20-30 seconds, stirring in between each interval. Be careful not to overheat the chocolate, as it can easily burn.
Tempering the Chocolate
Tempering chocolate is a process that involves heating and cooling the chocolate to specific temperatures, which helps achieve a glossy finish and a pleasing snap when it hardens. While tempering can be an advanced technique, it is worth exploring for more professional-looking results.
To temper chocolate, start by melting it in a double boiler or microwave. Once melted, remove it from the heat source and cool it slightly until it reaches a temperature of around 85°F (29°C) for dark chocolate or 80°F (27°C) for milk and white chocolate. Then, return the chocolate to heat briefly to raise its temperature to the desired working temperature: 88-90°F (31-32°C) for dark chocolate or 86-88°F (30-31°C) for milk and white chocolate. Stir the chocolate gently during the process to promote even cooling or reheating.
Tempered chocolate can be used for making chocolate decorations, coated truffles, or molded shapes, giving your baked goods an elegant and professional touch.
Using Chocolate in Baking
Once you have your chocolate prepared, it’s time to incorporate it into your baking. There are various ways you can use chocolate to elevate your recipes and add depth of flavor.
Replacing Cocoa Powder with Chocolate
In some recipes, you can substitute cocoa powder with an equivalent amount of melted chocolate for a richer and more intense chocolate flavor. Keep in mind that this substitution may alter the texture of your baked goods, so it’s best to experiment and adjust the recipe accordingly.
To substitute cocoa powder with chocolate, use 1 ounce (28 grams) of unsweetened chocolate for every 3 tablespoons (21 grams) of cocoa powder. Adjust the amount of sugar in the recipe accordingly, as unsweetened chocolate contains sugar.
Adding Chocolate Chunks or Chips to the Batter
One of the simplest ways to incorporate chocolate into your baking is by adding chunks or chips of chocolate to the batter. Whether it’s in cookies, muffins, or cakes, these chocolate morsels create delicious pockets of melty goodness throughout your treats.
When selecting chocolate chunks or chips, choose ones that are specifically meant for baking, as they hold their shape better during the baking process. You can use different types of chocolate, such as dark, milk, or white, depending on your preference and the recipe you’re making.
Creating Chocolate Swirls or Marbling Effects
If you want to add a visually stunning element to your baked goods, consider creating chocolate swirls or marbling effects. This technique is particularly popular in cakes and cheesecakes, where the contrasting colors and flavors create an eye-catching presentation.
To achieve this effect, melt different types of chocolate separately, then pour them into the batter in alternating dollops or lines. Use a knife or a skewer to gently swirl the chocolate together, creating a marbled effect. Be careful not to overmix, as you want distinct swirls and not a uniform color.
Experimenting with different patterns and combinations of chocolate can result in unique and beautiful designs, making your baked goods truly stand out.
Avoiding Common Mistakes
Working with chocolate can be a bit tricky, and it’s easy to make mistakes that can affect the final outcome of your baked goods. Here are a few common mistakes to avoid to ensure your chocolate creations turn out perfectly.
Overheating the Chocolate
One of the most common mistakes when melting chocolate is overheating it. Chocolate is very sensitive to heat and can easily burn or seize, resulting in a grainy and lumpy texture. To avoid overheating, always melt chocolate using the gentlest heat possible, whether it’s a double boiler or a microwave.
If your chocolate does seize and becomes stiff and grainy, try adding a small amount of vegetable oil or cocoa butter to help smooth it out. Alternatively, you can incorporate it into a sauce or frosting where the texture matters less.
Using Expired Chocolate
Using expired chocolate can negatively impact the flavor and texture of your baked goods. Chocolate that is past its prime may become dull in appearance, develop bloom (a whitish film), or have an off-putting taste. It’s essential to check the expiration dates on your chocolate bars or chips before using them.
Additionally, even if the chocolate is within its expiration date, make sure it has been stored correctly. Chocolate should be kept in a cool, dry place away from sunlight and strong odors to maintain its quality.
Not Using the Right Equipment
Using the right equipment can greatly contribute to your success in working with chocolate. For instance, using a dull knife or an inappropriate chopping board can make it difficult to achieve clean and even chocolate pieces. Invest in a sharp knife and a sturdy cutting board to make the chopping process smoother.
Similarly, using low-quality baking pans or utensils can result in uneven heat distribution, which can cause your chocolate to melt or bake unevenly. Opt for high-quality baking tools to ensure consistent results. Silicone spatulas and stainless steel bowls are particularly useful when melting and tempering chocolate, as they are heat resistant and easy to clean.
By using the right equipment and paying attention to the little details, you can prevent unnecessary complications and achieve professional-quality results with your chocolate creations.
Enhancing the Flavor
While chocolate is delicious on its own, there are several ways you can enhance its flavor and take your baked goods to the next level. Here are some tips for adding an extra dimension of taste to your chocolate treats.
Adding Espresso or Coffee
Coffee and chocolate are a match made in heaven, as the depth of the coffee flavor complements the richness of the chocolate. Adding a small amount of espresso powder or brewed coffee to your chocolate recipes can intensify the chocolate flavor and give it a subtle, smoky undertone.
For best results, dissolve espresso powder in hot water or add a small amount of freshly brewed and cooled coffee to your batter or frosting. The coffee flavor should be subtle enough to enhance the chocolate without overpowering it.
Using Spices and Herbs
Spices and herbs can add a unique twist to your chocolate creations, infusing them with interesting and complex flavors. Cinnamon, nutmeg, cardamom, and chili powder are excellent choices for adding warmth and depth to your chocolate recipes.
Herbs like mint, lavender, or rosemary can also pair beautifully with chocolate, providing a refreshing and aromatic element. Experiment with different combinations and proportions to find your preferred flavor profile.
When using spices and herbs, start with small amounts and gradually increase as needed. Remember, you want the flavors to complement each other and not overpower the chocolate itself.
Pairing Chocolate with Other Ingredients
Combining chocolate with other complementary ingredients can create a delightful balance of flavors in your baked goods. Some classic pairings include:
–Fruits: Fresh berries, citrus fruits, and tropical fruits like bananas or pineapples can add a refreshing and tangy taste to chocolate desserts.
–Nuts: Nuts such as almonds, hazelnuts, or peanuts can provide an excellent crunchy texture and a nutty undertone that complements the smoothness of chocolate.
–Caramel: The rich and buttery flavor of caramel pairs exceptionally well with chocolate, creating a luxurious and indulgent combination.
–Cheese: Soft cheeses like cream cheese or mascarpone can add a creamy and tangy element to chocolate desserts, creating a unique and sophisticated flavor profile.
Experimenting with different flavor combinations can lead to exciting discoveries and your own signature chocolate creations.
Storing and Preserving Chocolate
To ensure that your chocolate remains fresh and maintains its optimal quality, proper storage is essential. Here are some tips for storing and preserving your chocolate.
Properly Storing Chocolate
Chocolate should be stored in a cool, dry place with a temperature between 60°F (15°C) and 70°F (21°C). Exposure to heat and humidity can cause the cocoa butter in chocolate to separate, resulting in a whitish film called bloom.
Keep chocolate away from direct sunlight, as it can cause the chocolate to melt or develop off-flavors. Strong odors can also transfer to the chocolate, so store it separately from aromatic foods.
If you live in a particularly warm or humid climate, it is best to store your chocolate in the refrigerator or freezer to prevent melting and blooming. However, make sure to wrap it tightly in plastic wrap or place it in an airtight container to protect it from moisture and odors.
Freezing Chocolate
Freezing chocolate can extend its shelf life and help maintain its quality. However, freezing can cause changes in texture, so it is best to use frozen chocolate for baking or melting rather than eating it as is.
To freeze chocolate, wrap it tightly in plastic wrap or place it in an airtight container. Chocolate can be frozen for up to six months without significant loss of quality. When ready to use, allow the chocolate to thaw at room temperature before incorporating it into your recipes.
Reviving Dry or Bloomed Chocolate
If your chocolate has developed a whitish film called bloom or has become dry and crumbly, there are ways to revive it and make it usable again.
For bloom, which is caused by temperature fluctuations, you can remelt the chocolate and then temper it to restore its glossy appearance. Once tempered, the chocolate can be used as usual.
To revive dry or crumbly chocolate, you can add a small amount of vegetable oil or cocoa butter and gently heat the mixture until it becomes smooth and malleable again. Be careful not to overheat it, as it can lead to seizing.
By properly storing and preserving your chocolate, you can ensure that it remains in the best possible condition for your baking adventures.
Decorating with Chocolate
Chocolate is not only delicious to eat but also a versatile ingredient for decorating your baked goods. Here are a few techniques you can use to create impressive chocolate decorations.
Creating Chocolate Decorations
To create chocolate decorations, start by melting chocolate using the double boiler or microwave method mentioned earlier. Once the chocolate is melted, pour it into a piping bag or a plastic squeeze bottle with a small tip.
Pipe the melted chocolate onto parchment paper or a silicone mat in intricate swirls, shapes, or letters, depending on your desired design. Let the chocolate cool and harden at room temperature or in the refrigerator.
Once the chocolate decorations are set, gently peel them off the parchment paper and use them to adorn your cakes, cupcakes, or other baked goods. These edible embellishments add a touch of elegance and creativity to any dessert.
Using Chocolate Ganache for Frosting
Chocolate ganache is a smooth and luscious mixture of chocolate and heavy cream, which can be used as a frosting or a topping for your cakes and pastries. It is incredibly versatile and can be poured, spread, or piped to achieve different effects.
To make chocolate ganache, heat heavy cream in a saucepan until it just begins to simmer. Remove from heat and pour the hot cream over chopped chocolate in a bowl. Let it sit for a few minutes, then stir until the chocolate is completely melted and incorporated.
Allow the ganache to cool and thicken slightly before using it as a frosting. You can adjust the consistency by adding more cream for a pourable ganache or more chocolate for a thicker spreadable version.
Writing or Drawing with Melted Chocolate
If you have a steady hand and a creative flair, you can use melted chocolate to write messages or draw decorative designs on your desserts. Simply melt the chocolate as described earlier, pour it into a piping bag or a small zip-top bag, and snip a tiny hole in the corner.
Squeeze the melted chocolate gently to create thin lines or bold strokes, depending on your desired effect. Practice your piping skills on parchment paper before moving on to your actual baked goods.
Writing or drawing with melted chocolate allows you to personalize your creations and turn them into thoughtful gifts or showstopping centerpieces.
Troubleshooting Chocolate Issues
Even the most experienced bakers encounter challenges when working with chocolate. Here are some common issues you may face and how to overcome them.
Fixing Seized Chocolate
Seized chocolate occurs when chocolate comes into contact with even a small amount of liquid, causing it to clump and become lumpy. To fix seized chocolate, add a teaspoon of vegetable oil or cocoa butter and gently heat the mixture until the chocolate is smooth again.
If the seized chocolate is no longer usable for your original purpose, you can still salvage it by using it as a sauce or incorporating it into other recipes where the consistency is less crucial.
Preventing Chocolate Blotches on Cake
Chocolate blotches or streaks can occur when you add melted chocolate directly to cake batter. To prevent this, ensure that the melted chocolate is slightly cooled before incorporating it into the batter. Mixing the melted chocolate with a small amount of batter first also helps to distribute it more evenly.
Additionally, make sure to chop the chocolate into small pieces before melting it, as larger chunks can create uneven distribution within the batter.
Dealing with Chocolate Cracking
If you notice cracks on the surface of your chocolate creations, it’s likely due to improper tempering or cooling. To prevent cracking, ensure that you have properly tempered the chocolate and that it has cooled gradually and evenly.
Allowing the chocolate to cool at room temperature rather than placing it in the refrigerator can also help minimize cracking. Proper cooling allows the cocoa butter to crystallize slowly, creating a smooth and stable structure.
If cracking does occur, you can gently melt the chocolate again, repeating the tempering process to achieve a smoother finish.
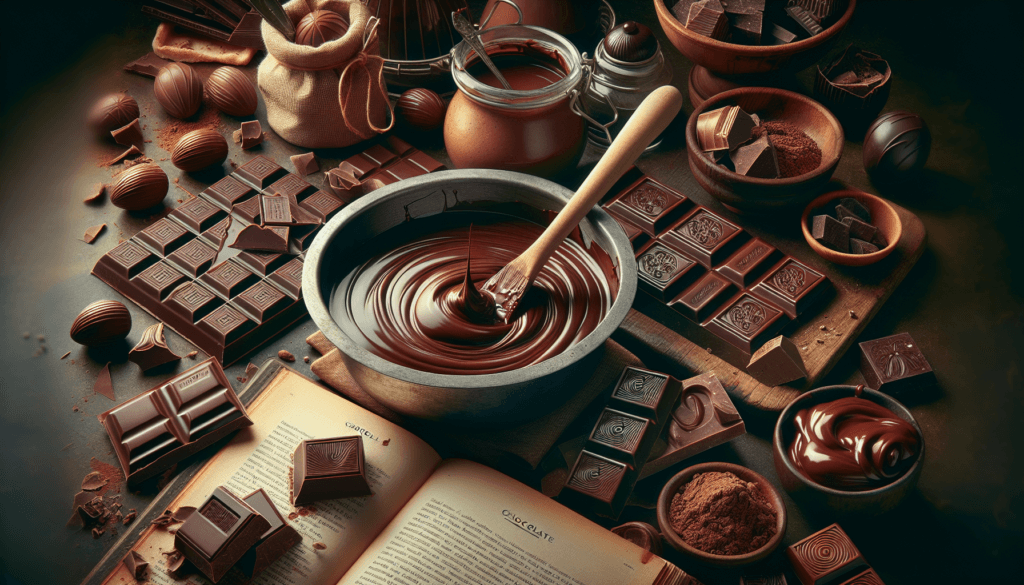
Exploring Different Chocolate Flavors
While traditional dark, milk, and white chocolates are widely loved, there are many other flavors and varieties of chocolate to explore. Here are some types of chocolate worth trying:
Trying Dark, Milk, and White Chocolate
If you have primarily worked with one type of chocolate, it’s time to venture into the world of dark, milk, and white chocolates. Each offers a unique flavor profile and can transform your baking in different ways.
–Dark Chocolate: Dark chocolate comes in a range of percentages, from 70% cocoa solids to higher concentrations. By trying various percentages, you can discover your preferred level of intensity and complexity.
–Milk Chocolate: Milk chocolate can differ in sweetness and creaminess depending on the brand and cocoa content. Experiment with different milk chocolate varieties to find the perfect balance for your recipes.
–White Chocolate: Often considered a more controversial form of chocolate, white chocolate brings a creamy and sweet flavor. While it lacks cocoa solids, it can still be a versatile ingredient in your baking.
Discovering Specialty Chocolates
Specialty chocolates offer unique flavor experiences that may surprise and delight you. Some options to consider include:
–Single-Origin Chocolate: Single-origin chocolates are made from cocoa beans grown in specific regions, resulting in distinct flavor profiles. Explore chocolates from different countries or estates to discover their specific nuances.
–Bean-to-Bar Chocolate: Bean-to-bar chocolates are made by small-scale artisans who carefully oversee every step of the chocolate-making process. These chocolates often showcase exceptional craftsmanship and flavors.
–Organic or Fair Trade Chocolate: If sustainability is important to you, consider trying organic or fair trade chocolates. These chocolates are produced using environmentally friendly and ethical practices.
Experimenting with Flavored Chocolates
Flavored chocolates can add an exciting twist to your baked goods. Some popular flavored chocolates to experiment with include:
–Fruit-Infused Chocolate: Fruit-infused chocolates, such as orange or raspberry, offer a delightful burst of fruity flavor that pairs well with a variety of desserts.
–Spiced Chocolate: Spiced chocolates, such as cinnamon or chili-infused, can add a touch of warmth and complexity to your baked goods.
–Nutty Chocolate: Nut-infused chocolates, such as almond or hazelnut, combine the richness of chocolate with the nutty flavors you love.
By exploring different chocolate flavors, you can expand your baking repertoire and create unique flavor combinations that will surprise and delight your taste buds.
Advanced Techniques with Chocolate
Once you have mastered the basics of working with chocolate, you can explore more advanced techniques to elevate your baking skills. Here are some advanced techniques to try:
Making Chocolate Mousse
Chocolate mousse is a decadent and velvety dessert that showcases the essence of chocolate. While it requires a bit more precision, the end result is well worth the effort.
To make chocolate mousse, start by melting chocolate and allowing it to cool slightly. Whip cream until it reaches soft peaks, then gently fold the melted chocolate into the whipped cream. Chill the mousse in the refrigerator for several hours to set.
Chocolate mousse can be served on its own or used as a filling for cakes, pastries, or desserts. Garnish with fresh berries or a sprinkle of cocoa powder for an elegant finishing touch.
Creating Truffles
Truffles are bite-sized chocolate confections that are both indulgent and visually appealing. Making truffles involves shaping and coating ganache, which is a mixture of chocolate and cream.
To create truffles, start by making chocolate ganache using a higher ratio of chocolate to cream to achieve a firmer consistency. Once the ganache has cooled and hardened, scoop small portions and shape them into balls. Roll the truffles in cocoa powder, chopped nuts, or shredded coconut for added texture and flavor.
Truffles can be customized with different flavors, such as espresso, liqueur, or spices, and make a delightful gift or addition to a dessert platter.
Tempering Chocolate for Molded Shapes
If you want to take your chocolate creations to the next level, tempering chocolate for molded shapes is a technique you should explore. Tempered chocolate has a glossy finish and a pleasing snap when it hardens, making it ideal for creating intricate and beautiful designs.
To temper chocolate, start by melting it using the double boiler or microwave method described earlier. Once melted, cool the chocolate slightly, then warm it until it reaches the desired working temperature. Pour the tempered chocolate into molds, ensuring it coats every corner, and tap the molds gently to remove any air bubbles.
Allow the chocolate to harden at room temperature or in the refrigerator. Once fully set, carefully remove the molded shapes from the molds, and use them to decorate your cakes or desserts.
Tempering chocolate for molded shapes requires patience and practice, but the stunning results are well worth the effort.
Whether you are a beginner or an experienced baker, working with chocolate opens up a world of possibilities in the realm of desserts. By choosing the right type of chocolate, prepping it correctly, and incorporating it thoughtfully into your recipes, you can create delectable treats that will impress your friends and family. With a bit of practice and some experimentation, you’ll soon be baking with chocolate like a pro. So go ahead, grab your apron, and get ready to embark on a chocolate-filled culinary adventure!
