Are you eager to learn the art of baking with yeast, but feel intimidated by all the steps and techniques involved? Fear not, for this beginner’s guide is here to help you navigate the wonderful world of yeast-based baking. From understanding the different types of yeast to mastering the proofing process, this article will provide you with the essential knowledge and confidence to create deliciously fluffy breads, fluffy cinnamon rolls, and more. So grab your apron and get ready to embark on a baking adventure that will leave your kitchen filled with the irresistible aroma of freshly baked goods.

Choosing the Right Type of Yeast
When it comes to baking with yeast, choosing the right type of yeast is crucial for achieving the desired results. There are three main types of yeast commonly used in baking: active dry yeast, instant yeast, and fresh yeast. Each of these yeast varieties has its distinct characteristics and uses.
Active Dry Yeast
Active dry yeast is one of the most commonly available forms of yeast and has been used by home bakers for decades. It is composed of live yeast cells that have been dehydrated and coated with a protective layer. To use active dry yeast, it needs to be dissolved in warm water before adding it to the dough.
Active dry yeast requires proofing, which means it needs to be activated and bloomed in warm liquid before being added to the dough. This step helps to ensure that the yeast is active and will effectively leaven the dough. Active dry yeast has a longer shelf life compared to other yeast types, making it a convenient choice for those who don’t bake frequently.
Instant Yeast
Instant yeast, also known as rapid-rise or quick-rise yeast, is a type of yeast that does not require proofing. It can be added directly to the dry ingredients or mixed with the water, eliminating the need for an additional step. Instant yeast is finely granulated and has a higher concentration of active yeast cells compared to active dry yeast.
Due to its fine texture and potent formulation, instant yeast provides a quicker rise and is especially suitable for bread machines or recipes with shorter rising times. It is also more tolerant to higher temperatures during the dough-making process. While it has a shorter shelf life than active dry yeast, instant yeast is a popular choice for many bakers due to its convenience and reliability.
Fresh Yeast
Fresh yeast, also known as cake yeast or compressed yeast, is the least common yeast variety found in most supermarkets. It has a moist texture and needs to be refrigerated to maintain its freshness. Fresh yeast contains the highest concentration of living yeast cells, making it an excellent choice for bread recipes that require a strong rise.
To use fresh yeast, it needs to be crumbled or dissolved in warm water before incorporating it into the dough. Fresh yeast provides a distinct aroma and flavor to the bread and is often preferred by artisan bakers. However, it has a short shelf life compared to other yeast types and needs to be used within a week or two of purchase.
Understanding Yeast Activation
Whether you are using active dry yeast, instant yeast, or fresh yeast, understanding yeast activation is essential to ensure a successful rise and a flavorful loaf. The activation process may vary slightly depending on the type of yeast you are using.
Proofing the Yeast
For recipes that call for active dry yeast, proofing is necessary to activate the yeast. To proof the yeast, start by dissolving it in warm water with a pinch of sugar. The warm water should be around 110°F (43°C) – warm to the touch but not hot. Let the mixture sit for about 5-10 minutes until it becomes foamy and bubbly. This indicates that the yeast is active and ready to be added to the dough.
Activating Instant Yeast
Instant yeast does not require proofing and can be added directly to the dry ingredients or mixed with the water. However, to ensure its activation and performance, it is recommended to mix the instant yeast with some warm water before incorporating it into the recipe. This step allows the yeast to hydrate and activate before being added to the dough.
Using Fresh Yeast
Fresh yeast needs to be crumbled or dissolved in warm water to activate it. Similar to active dry yeast, it is crucial to use warm water (around 110°F or 43°C) to ensure the yeast’s optimal activation. Once the yeast is dissolved, stir it gently until it forms a smooth mixture, and then add it to the dough.
By following the appropriate activation method for the type of yeast you are using, you can ensure that your yeast is alive and ready to leaven the bread.

Preparing the Ingredients
Before diving into the dough-making process, it is essential to prepare the ingredients properly. This includes measuring the ingredients accurately, choosing the right flour, and adding salt and sugar.
Measuring Ingredients
Accurate measurements are crucial in baking with yeast, as they directly impact the texture and rise of the bread. When measuring dry ingredients such as flour or sugar, use a kitchen scale or a set of measuring cups and spoons to ensure precision. It is always recommended to measure the ingredients by weight if possible, as it provides the most accurate results.
When measuring flour, it is crucial to avoid packing it tightly into the measuring cup. Instead, lightly spoon the flour into the cup and level off the excess with a straight edge. This method helps prevent an excessive amount of flour from being added, which could result in a dense and heavy loaf.
Choosing the Right Flour
The type of flour you choose also plays a significant role in the texture and flavor of the bread. While all-purpose flour is the most commonly used flour in bread baking, there are other options available depending on the desired outcome.
Bread flour, for example, has a higher protein content, which provides structure and elasticity to the dough. This makes it suitable for bread recipes that require a chewy texture and a substantial rise. Whole wheat flour adds a nutty flavor and a denser texture to bread, making it a popular choice for healthier, heartier loaves.
Experimenting with different types of flour can result in unique and delicious bread variations. It’s important to note that whole wheat flours often require more moisture, so adjusting the hydration level may be necessary when using them in recipes.
Adding Salt and Sugar
Salt and sugar are essential ingredients in yeast bread recipes. Salt not only enhances the flavor of the bread but also helps regulate fermentation and strengthen the gluten structure. It is important to measure and add salt correctly according to the recipe. Too little salt can result in a bland-tasting bread, while too much salt can inhibit yeast activity.
Sugar, on the other hand, provides food for the yeast and contributes to the browning of the crust. It also adds sweetness to the bread, enhancing the overall flavor. Depending on the recipe, sugar can be added directly to the dough or used in the form of a sweetener such as honey or molasses.
By carefully measuring and adding salt and sugar, you can achieve the right balance of flavors in your bread while ensuring a successful rise and fermentation process.
Mixing and Kneading the Dough
Once the ingredients are prepared, it’s time to mix and knead the dough. This stage is crucial in developing gluten, which gives bread its structure and chewiness.
Mixing the Ingredients
The mixing process involves combining the dry ingredients, including flour, yeast, salt, and sugar, with the wet ingredients, such as water, milk, or eggs. Depending on the recipe, it may call for the incorporation of fats like butter or oil. Follow the recipe instructions to determine the order in which the ingredients should be combined.
Start by adding the liquids to the dry ingredients, mixing them together until a shaggy dough forms. Then, gradually incorporate the remaining dry ingredients, mixing well until the dough starts to come together. Mixing can be done by hand using a wooden spoon or with the help of a stand mixer fitted with a dough hook attachment.
Kneading Techniques
Kneading is a crucial step that helps develop gluten and create a smooth, elastic dough. It involves applying pressure and folding the dough repetitively to stretch the gluten strands. Kneading can be done by hand or using a stand mixer with a dough hook.
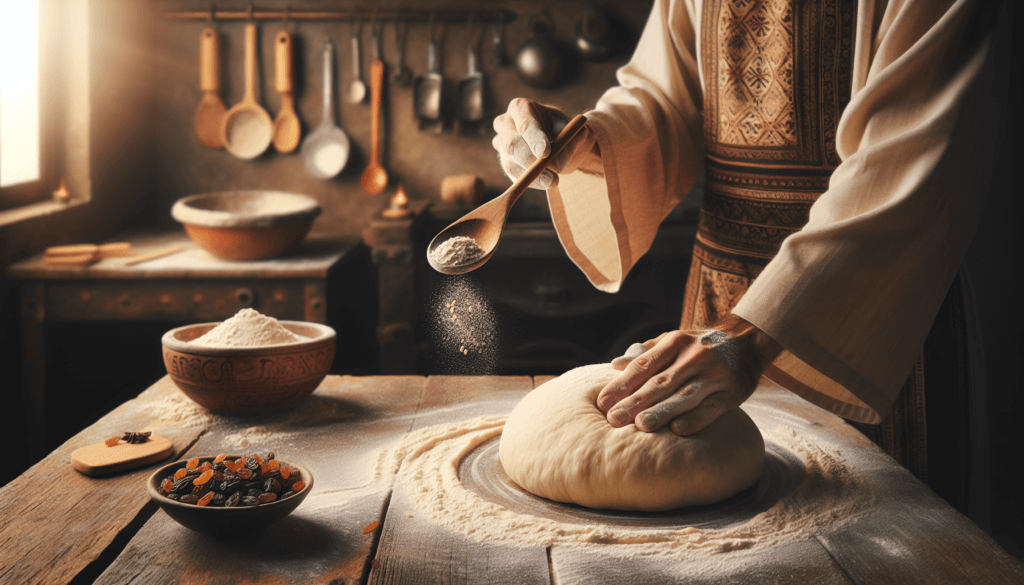
To knead the dough by hand, lightly flour a clean surface and transfer the dough to it. Use the heel of your hand to push the dough forward, then fold it back over itself. Rotate the dough a quarter turn and repeat the process, adding more flour as needed to prevent sticking. Continue kneading for about 8-10 minutes until the dough feels smooth and springs back when lightly pressed with a finger.
When using a stand mixer, attach the dough hook and set the speed to low. Let the mixer knead the dough for about 8-10 minutes until it becomes smooth and elastic. It’s important to keep an eye on the dough while using a stand mixer to avoid over-kneading, which can result in a dense and tough texture.
Determining the Right Texture
The texture of the dough is a crucial indicator of whether it has been properly mixed and kneaded. A well-kneaded dough should be smooth, elastic, and slightly tacky to the touch. When you gently stretch a small part of the dough, it should stretch without tearing, forming a thin, translucent membrane called the gluten window.
If the dough feels excessively sticky and doesn’t hold its shape, it may require additional kneading or a bit more flour. On the other hand, if the dough feels too stiff and does not stretch easily, it may need a little more moisture or additional kneading to develop the gluten further.
By paying attention to the texture of the dough, you can ensure that it is properly mixed and kneaded, resulting in a well-risen and flavorful loaf of bread.
First Rise of the Dough
After the dough has been mixed and kneaded, it needs to undergo its first rise, also known as the fermentation stage. This allows the yeast to convert sugars into carbon dioxide gas, causing the dough to rise and develop flavor. Several factors come into play to ensure a successful first rise.
Choosing the Proper Environment
Providing the right environment for the first rise is crucial for yeast activity. Yeast thrives in warm and moist conditions, typically between 75-85°F (24-29°C). It’s important to find a warm spot in your kitchen, free from drafts, to allow the dough to rise properly. If the room is cooler, you can create a warm environment by preheating your oven to a low temperature (around 200°F or 95°C) for a few minutes, then turning it off. Place the covered dough in the warm oven to rise.
Covering and Allowing to Rise
To prevent the dough from drying out and to create a warm and humid environment, cover it with a clean kitchen towel or plastic wrap. This helps to trap the moisture and retain heat, aiding in the fermentation process. Make sure the cover is loose enough to allow the dough to rise but prevents it from getting a crusty surface.
The duration of the first rise can vary based on the recipe and ambient temperature. Generally, the dough should double in size during this time, which can take anywhere from 1-2 hours. However, it’s important to rely on visual cues rather than time alone. Keep an eye on the dough and wait until it has visibly increased in volume before moving on to the next step.
Determining Doneness
To check if the dough has risen enough, gently press two fingertips about half an inch into the dough. If the indentation springs back slowly, leaving a slight impression, the dough is ready for the next step. If the dough springs back immediately, it needs more time to rise. Conversely, if the indentation remains without bouncing back, the dough may have over-risen, and you may need to adjust the timing in future baking attempts.
By providing the right environment, covering the dough properly, and determining its readiness by visual and tactile cues, you can ensure a successful first rise and set the stage for a beautifully risen loaf of bread.
Shaping and Second Rise
After the dough has completed its first rise, it’s time to shape it into the desired form and allow it to rise again. This second rise gives the dough additional strength and structure, contributing to a well-rounded and evenly baked loaf.
Punching down the Dough
Before shaping the dough, it’s common practice to “punch down” or deflate the dough gently. This step helps to release any large gas pockets that have formed during the first rise and redistributes the yeast and fermentation by-products evenly throughout the dough.
To punch down the dough, lightly flour a clean surface, and transfer the risen dough onto it. Gently press your fingertips or the heel of your hand into the center of the dough, expelling the excess gas. As you deflate the dough, it will shrink in size.
Shaping Techniques
Shaping the dough not only enhances the aesthetic appeal of the bread but also determines how it will rise and bake. Different bread recipes require specific shaping techniques, so it’s essential to follow the instructions provided in the recipe.
Whether you’re shaping a boule (round loaf), batard (elongated loaf), or baguette, start by gently stretching the dough into a rectangle or oval shape. Then, fold the sides of the dough towards the center, overlapping slightly, and tightly roll it into a log or circle. It’s important to apply gentle pressure and tuck in the seams to ensure a tight and well-sealed shape.
Allowing for Second Rise
After shaping the dough, place it on a parchment-lined baking sheet or in a greased loaf pan, depending on the recipe. Cover the dough loosely with a kitchen towel or plastic wrap to prevent it from drying out while allowing it to rise.
The second rise, also known as the proofing stage, is shorter in duration compared to the first rise. It typically takes around 30-60 minutes, although the exact time may vary based on the recipe and ambient temperature. The dough should visibly increase in volume and become slightly puffy during this time, but it may not double in size like the first rise.
By deflating and shaping the dough correctly and allowing it to rise a second time, you are setting the stage for a well-formed and beautifully risen loaf.

Choosing Baking Equipment
Selecting the right baking equipment is essential to ensure even heat distribution, proper crust development, and an overall successful baking process. There are several options available, including various types of baking pans and baking sheets.
Types of Baking Pans
The choice of baking pan depends on the type of bread you’re making and the desired shape and crust. Common options include loaf pans, round cake pans, or specialty pans like brioche molds or baguette pans. It’s important to grease or line the baking pan with parchment paper to prevent the bread from sticking.
For sandwich loaves or bread with a soft crust, a loaf pan is often the best option. Loaf pans provide support and help the dough rise upwards, resulting in a well-shaped loaf. Cake pans or round pans are suitable for free-form loaves or artisan-style bread that requires a crisp and open crust.
Using Baking Sheets
Baking sheets, also known as sheet pans or cookie sheets, are versatile and can be used for a variety of breads. They are especially useful for baking breads that require a freestanding shape or need to be baked directly on the surface, such as baguettes or artisan bread. Baking sheets should be preheated in the oven to ensure even heat distribution and a proper rise.
When using baking sheets, it’s important to either grease or line them with parchment paper to prevent the bread from sticking and to facilitate easy removal.
Alternative Baking Options
In addition to traditional baking pans and sheets, there are alternative baking options that can add unique qualities to your bread. Baking stones or pizza stones, for example, provide a hot surface that helps to absorb moisture from the dough and create a crisp crust. These stones should be preheated in the oven and placed on the lower rack.
Cast iron Dutch ovens and cloches are another option for artisan-style bread. These vessels trap moisture during baking, resulting in a beautiful crust and oven-spring. They create a steamy environment similar to professional bread ovens, allowing the dough to rise and expand before developing a high, crusty loaf.
By selecting the appropriate baking equipment based on the desired bread shape and crust, you can ensure even baking and achieve the desired results.
Baking Time and Temperature
Determining the right time and temperature for baking bread is crucial to achieve a fully baked loaf with a perfect crust and crumb. Proper heat distribution, oven preheating, and accurate timing all contribute to the success of the baking process.
Determining the Right Temperature
The baking temperature varies depending on the type of bread and the size of the loaf. Most yeast bread recipes call for an initial high temperature (around 400°F or 200°C) to encourage oven spring and crust formation. After a brief period at the high temperature, the oven temperature is reduced to a moderate level (around 350°F or 180°C) to ensure even and thorough baking.
It’s important to accurately preheat the oven to the desired temperature before placing the dough inside. An oven thermometer can be helpful to verify that the oven is reaching the intended temperature accurately.
Setting the Baking Time
The baking time largely depends on the size and thickness of the bread as well as the type of yeast used. In general, most loaves of bread will take around 20-40 minutes to bake. However, it is essential to follow the recipe’s instructions for specific guidelines.
Baking times can be influenced by various factors, including the oven’s actual temperature, the type of baking pan used, and the desired crust color. Checking the internal temperature of the bread using an instant-read thermometer can provide a more accurate indication of doneness. The internal temperature of a fully baked loaf should be around 190-200°F (88-93°C).
Checking for Doneness
To determine if the bread is fully baked, there are several visual and tactile cues to look for. The crust should be golden brown and firm to the touch. If the crust appears pale or soft, it may need a few more minutes of baking.
Another way to test for doneness is to remove the bread from the pan and tap the bottom. If it sounds hollow, like a drum, the bread is likely fully baked. Additionally, you can insert an instant-read thermometer into the center of the bread. If the thermometer reads around 190-200°F (88-93°C), the bread is done.
By preheating the oven properly, setting the appropriate temperature and baking time, and using visual and tactile cues to determine doneness, you can achieve perfectly baked bread every time.
Cooling and Storing the Bread
Once the bread is baked to perfection, it’s crucial to allow it to cool properly before slicing or storing. Proper cooling ensures that the internal moisture evens out, resulting in a well-distributed crumb and stable texture.
Allowing to Cool Properly
After removing the bread from the oven, transfer it to a wire rack to cool. This allows air to circulate around the loaf, preventing moisture buildup and keeping the crust crisp. It’s important to resist the temptation to slice into the bread immediately, as this can lead to a gummy interior and collapse of the loaf.
The cooling process can take anywhere from 1-2 hours, depending on the size of the loaf and ambient temperature. Larger loaves may require a longer cooling time to allow the center to fully set.
Storing for Freshness
Once the bread has cooled completely, it’s time to store it to maintain its freshness. Storing bread properly helps to prevent it from drying out prematurely and prolongs its shelf life.
The best way to store bread is to place it in a paper bag, bread box, or a clean cotton bread bag. These storage methods allow for some air circulation, preventing moisture buildup and keeping the crust from becoming excessively crisp. If a paper bag or bread box is unavailable, you can wrap the bread loosely in a clean kitchen towel or place it in a plastic bag with the top loosely closed.
It’s important to note that storing bread in the refrigerator can accelerate the staling process, causing it to become dry and lose its freshness more quickly. Therefore, it’s generally recommended to store bread at room temperature.
Reheating Techniques
If you find yourself with leftover bread that has become slightly stale, there are a few reheating techniques to revive its freshness. Wrapping the bread in aluminum foil and placing it in a preheated oven at a low temperature (around 300°F or 150°C) for about 10-15 minutes can help to rehydrate the interior and restore some softness.
Another option is to lightly dampen a kitchen towel and wrap it around the bread. Then, microwave the wrapped bread for a few seconds until it becomes warm and soft. This method is quick and convenient when you need to revive a few slices of bread.
By allowing the bread to cool properly, storing it correctly, and reheating it if necessary, you can enjoy fresh and flavorful bread even after it has been baked.
Troubleshooting Common Issues
Baking with yeast can sometimes be unpredictable, and various issues may arise during the process. Understanding common problems and their solutions can help troubleshoot and prevent them in future baking endeavors.
Dense or Heavy Bread
Bread that turns out dense or heavy often indicates insufficient yeast activity or gluten development. To address this issue, ensure that you are using fresh yeast and that it is properly activated before incorporating it into the dough. Additionally, knead the dough well to develop gluten strands fully, allowing the bread to rise to its full potential.
Using the correct flour type and measuring ingredients accurately are also essential for achieving a light and fluffy texture. If the dough is too dry, consider adjusting the hydration level by adding a bit more liquid, such as water or milk. On the other hand, if the dough is too wet and sticky, gradually incorporate small amounts of flour until the desired consistency is achieved.
Failure to Rise
If the dough fails to rise during the fermentation stage, it usually indicates issues with yeast activation or environmental factors. Ensure that the yeast is fresh and active by properly proofing or activating it. Check the expiration date on the yeast package and store it in a cool, dry place to maintain its viability.
Environmental factors, such as low room temperature or drafty conditions, can also inhibit proper yeast activity. Providing a warm environment, as discussed earlier, is crucial for yeast fermentation. If the room temperature is cool, consider using alternative methods such as preheating the oven or finding a warm spot in your kitchen to allow for proper rising.
Overly Yeasty Flavor
An overly yeasty flavor in bread can result from using excessive amounts of yeast or insufficient rising and fermentation time. It’s important to accurately measure the yeast and follow the recipe instructions to avoid adding too much yeast. Additionally, try giving the dough more time to rise and ferment to allow the yeast to develop its flavors fully. A longer rise can help mellow the yeasty taste and create a more complex flavor profile.
By troubleshooting common issues like dense bread, failure to rise, and overly yeasty flavor, you can overcome challenges and achieve consistently delicious results in your bread baking adventures.
Baking with yeast may seem intimidating at first, but with the right knowledge and practice, it can be a rewarding experience. By choosing the right type of yeast, understanding yeast activation, preparing the ingredients properly, mastering the mixing and kneading techniques, and following the appropriate rise and baking guidelines, you can create homemade bread that is flavorful, well-risen, and perfect in every way. So put on your apron, grab your ingredients, and let the magical process of yeast and time create a beautiful loaf of bread that will fill your kitchen with warmth and irresistible aromas. Happy baking!

