You know that feeling when you walk into a fancy restaurant and are immediately captivated by the beautifully crafted desserts on display? They look almost too stunning to eat. But what if you could recreate that same level of culinary artistry right in your own kitchen? In this article, we’ll unveil the best ways for you to make show-stopping desserts with chocolate garnishes. From simple drizzles to intricate designs, we’ll guide you through the process, ensuring that your desserts become the talk of the town. So, grab your apron and get ready to unleash your inner chocolatier.

Choosing the Right Chocolate
When it comes to making show-stopping desserts with chocolate garnishes, the first step is choosing the right type of chocolate. There are three main types of chocolate to choose from: dark chocolate, milk chocolate, and white chocolate.
Dark chocolate is known for its rich, intense flavor. It has a higher percentage of cocoa solids, which gives it a deep, bittersweet taste. Dark chocolate also tends to have less sugar and a smoother texture. It is a great choice for those who prefer a more sophisticated and less sweet flavor profile in their desserts.
Milk chocolate, on the other hand, is sweeter and creamier than dark chocolate. It contains a higher percentage of sugar and milk solids, giving it a smoother and milder taste. Milk chocolate is a popular choice for desserts that are enjoyed by people of all ages, as its sweetness is often more appealing to a wider audience.
White chocolate, although technically not a chocolate because it does not contain cocoa solids, is still a delicious option for chocolate garnishes. Made from cocoa butter, sugar, and milk solids, white chocolate has a creamy and sweet flavor. It adds a touch of elegance to desserts and is particularly popular in recipes that call for a lighter and more delicate chocolate flavor.
When choosing the right chocolate for your garnishes, consider the taste and texture you desire for your final creation. Whether you opt for the rich intensity of dark chocolate, the creamy sweetness of milk chocolate, or the elegant touch of white chocolate, each type has its own unique characteristics that can elevate your desserts to new heights.
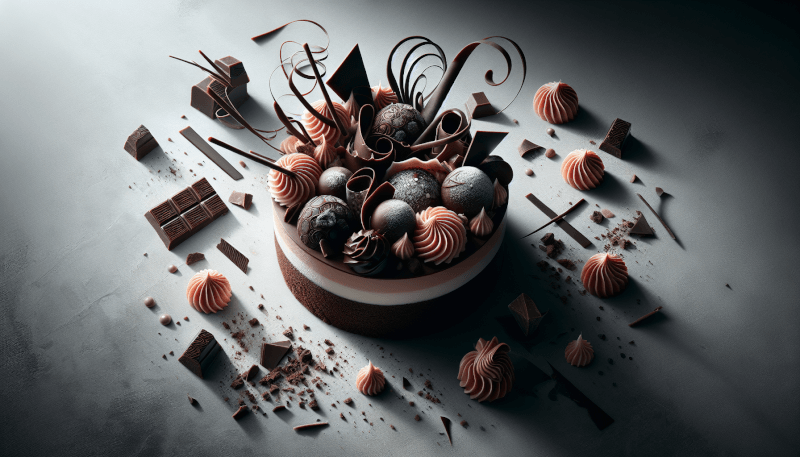
Creating Chocolate Curls
One of the most visually stunning chocolate garnishes is the chocolate curl. Chocolate curls are delicate, curled ribbons of chocolate that can be used to decorate cakes, cupcakes, or any other dessert you desire. There are several methods to create chocolate curls, each with its own unique process and outcome.
The first method to create chocolate curls is by using a vegetable peeler. Start by placing a block of chocolate on a flat surface. Hold the vegetable peeler at a 45-degree angle and gently scrape it across the chocolate, applying light pressure. As you move the peeler, the chocolate will curl up, creating beautiful chocolate curls. This method is great for creating large, dramatic curls that can be used as the centerpiece of your dessert.
Another method to create chocolate curls is by using a knife. Start by heating the blade of a knife by running it under hot water and drying it thoroughly. Once the knife is hot, gently scrape it along the edge of a block of chocolate at a 45-degree angle. The heat from the knife will melt the chocolate slightly, allowing it to curl as you scrape. This method is ideal for creating smaller, more intricate curls that can be scattered across your dessert.
If you prefer a more precise curl, you can also use a piping bag to create chocolate curls. Fill a piping bag fitted with a small, round tip with melted chocolate. Pipe long, thin lines of chocolate onto a baking sheet lined with parchment paper. Once the chocolate has hardened, gently roll each line into a curl. This method allows you to have more control over the shape and size of your curls.
Whether you choose to use a vegetable peeler, a knife, or a piping bag, creating chocolate curls adds a touch of elegance and sophistication to your desserts. Experiment with different methods to find the one that works best for you and get ready to impress your guests with your artistic chocolate garnishes.

Making Chocolate Shavings
Chocolate shavings are another delightful way to garnish your desserts. They add a delicate and elegant touch, creating a visually appealing contrast with the smooth texture of the dessert. There are two main methods to make chocolate shavings: using a grater and using a microplane.
To make chocolate shavings using a grater, start by choosing a block of chocolate that is at room temperature. Hold the grater firmly in one hand and the block of chocolate in the other. With gentle pressure, rub the block of chocolate against the grater in a downward motion. The chocolate will start to form thin, delicate shavings that can be sprinkled over desserts such as cakes, ice cream, or mousses. This method is quick and easy, and it allows you to control the thickness of the shavings by adjusting the pressure you apply.
If you prefer a finer texture for your chocolate shavings, you can use a microplane. Similar to a grater, a microplane is a tool with small, sharp blades that are perfect for finely grating chocolate. Hold the microplane firmly in one hand and the block of chocolate in the other. Gently rub the block of chocolate against the microplane in a downward motion. The chocolate will be grated into fine pieces, which can be sprinkled over desserts for a delicate finishing touch.
When making chocolate shavings, it is important to choose the right tool for the desired thickness and texture. Whether you choose to use a grater for thicker shavings or a microplane for finer shavings, both methods will add a beautiful and delicious touch to your desserts.
Tempering Chocolate for Garnishes
Tempering chocolate is a crucial step when making chocolate garnishes. Tempering is the process of heating and cooling chocolate to specific temperatures to stabilize its cocoa butter crystals, resulting in a glossy and smooth finish. There are several methods to temper chocolate, including the seeding method, the tabling method, and the microwave method.
The seeding method is one of the most common and reliable methods for tempering chocolate. Start by chopping your chocolate into small, uniform pieces. Place the majority of the chocolate in a heatproof bowl and set it over a pot of simmering water, making sure the bottom of the bowl does not touch the water. Stir the chocolate constantly as it melts, until it reaches a temperature of around 115-120°F (46-49°C) for dark chocolate or 110-115°F (43-46°C) for milk or white chocolate. Remove the bowl from the heat and add the remaining chopped chocolate, also known as the “seed.” Stir until the seed is completely melted, and the chocolate reaches a temperature of around 88-91°F (31-33°C) for dark chocolate or 86-88°F (30-31°C) for milk or white chocolate. The chocolate is now tempered and ready to be used for garnishes.
The tabling method, although more advanced, can yield outstanding results. Start by melting your chocolate using the same technique as the seeding method until it reaches a temperature of around 115-120°F (46-49°C) for dark chocolate or 110-115°F (43-46°C) for milk or white chocolate. Pour two-thirds of the melted chocolate onto a cool, marble surface and spread it out with a spatula or palette knife. Use a bench scraper or palette knife to gather the chocolate back into the center, working it back and forth until it reaches a temperature of around 82-84°F (28-29°C) for dark chocolate or 80-82°F (27-28°C) for milk or white chocolate. Add the cooled chocolate back into the remaining melted chocolate and stir until the two are fully combined. The chocolate is now tempered and can be used for garnishes.
If you prefer a quicker method, the microwave method can be a convenient option. Start by chopping your chocolate into small, uniform pieces and place them in a microwave-safe bowl. Microwave the chocolate in short bursts of 15-20 seconds at a time, stirring between each interval. Be careful not to overheat the chocolate as it can seize and become unusable. Continue microwaving and stirring until the chocolate is almost melted, with a few small lumps remaining. Stir vigorously until the remaining lumps have melted and the chocolate reaches a temperature of around 88-91°F (31-33°C) for dark chocolate or 86-88°F (30-31°C) for milk or white chocolate. The chocolate is now tempered and ready to be used for garnishes.

Molding Chocolate Garnishes
Molding chocolate garnishes allows you to create intricate and decorative shapes that can take your desserts to the next level. There are two main methods for molding chocolate garnishes: using silicone molds and using plastic molds.
Silicone molds are a popular choice for molding chocolate due to their flexibility and ease of use. Start by selecting a silicone mold with the desired shape and size for your garnish. Place the mold on a baking sheet or tray to provide stability. Melt your tempered chocolate and pour it into the silicone mold, ensuring that each cavity is filled completely. Use a spatula or palette knife to smooth the surface of the mold, removing any excess chocolate. Tap the mold gently on the counter to release any air bubbles. Place the mold in the refrigerator or freezer to allow the chocolate to set completely. Once the chocolate is firm, carefully remove it from the mold by gently flexing the sides. Your beautifully molded chocolate garnish is now ready to be used as an eye-catching decoration for your desserts.
Plastic molds are another option for molding chocolate garnishes, especially if you are looking for a more rigid and defined shape. Similar to silicone molds, start by selecting a plastic mold with the desired shape and size. Place the mold on a baking sheet or tray. Melt your tempered chocolate and pour it into the mold, filling each cavity completely. Use a spatula or palette knife to smooth the surface and remove any excess chocolate. Tap the mold gently on the counter to release air bubbles. Place the mold in the refrigerator or freezer to allow the chocolate to set completely. Once the chocolate is firm, carefully remove it from the mold by gently pressing on the back of each cavity. Plastic molds create stunning and detailed chocolate garnishes that are sure to impress your guests.
Experiment with different shapes and designs when molding chocolate garnishes to add a touch of artistry and elegance to your desserts. Whether you choose to use silicone molds or plastic molds, both methods will allow you to create stunning and intricate chocolate garnishes that will elevate your desserts to a whole new level.
Using Chocolate Transfer Sheets
Chocolate transfer sheets are a fantastic way to add intricate designs and patterns to your desserts. They are thin sheets of acetate that are printed with edible cocoa butter in various patterns and designs. Using chocolate transfer sheets is a simple and effective technique for creating professional-looking desserts.
To apply transfer sheets to desserts, start by selecting a transfer sheet with the desired pattern or design. Ensure that the transfer sheet is larger than the surface area of the dessert you wish to decorate. Melt and temper your chocolate and spread it evenly over the transfer sheet using a palette knife or spatula. Allow the chocolate to set partially, until it is tacky to the touch but not completely firm. Carefully press the tacky side of the transfer sheet onto the surface of the dessert, ensuring that it adheres evenly. Gently peel back the transfer sheet to reveal the intricate design that has transferred onto the chocolate. Voila! Your dessert now features a beautiful and professional-looking chocolate pattern.
If you want to create custom designs using chocolate transfer sheets, start by melting and tempering your chocolate as usual. Spread the tempered chocolate onto a clean sheet of acetate or parchment paper, creating your desired design or pattern. Allow the chocolate to firm up slightly, then carefully place a transfer sheet on top of the design. Use your fingers to press down gently, ensuring that the transfer sheet adheres tightly to the chocolate. Place the chocolate in the refrigerator or freezer to allow it to set completely. Once set, gently peel off the transfer sheet to reveal your custom-designed chocolate. This technique allows you to be creative and artistic, making your desserts truly one-of-a-kind.
Using chocolate transfer sheets is a simple yet effective way to take your desserts to the next level. From elegant patterns to custom designs, the possibilities are endless. Experiment with different transfer sheet designs and techniques to create stunning and visually appealing desserts that are sure to impress.

Making Chocolate Cages
A chocolate cage is an elegant and impressive way to garnish your desserts. It adds a touch of sophistication and artistry, turning an ordinary dessert into a show-stopping masterpiece. There are two main methods for making chocolate cages: using a template and freehand shaping.
If you prefer a more precise and uniform chocolate cage, start by creating a template. Draw the desired shape of your chocolate cage on a piece of parchment paper or acetate. Ensure that the template is the correct size for your dessert. Melt and temper your chocolate, then transfer it to a piping bag fitted with a small round tip. Pipe the chocolate onto the template, following the outline you have drawn. Allow the chocolate to set partially, until it is tacky to the touch but still pliable. Carefully lift the chocolate from the template and shape it into a cage, joining the ends to form a complete shape. Place the chocolate cage in the refrigerator or freezer to allow it to set completely. Once set, gently remove the parchment paper or acetate, revealing your beautifully shaped chocolate cage.
If you prefer a more artistic and freeform approach, you can shape the chocolate cage by hand. Melt and temper your chocolate as usual, then transfer it to a piping bag fitted with a small round tip. Pipe the melted chocolate onto a clean sheet of parchment paper or acetate, creating random lines and shapes. Allow the chocolate to set until it is partially firm but still pliable. Gently lift the chocolate from the parchment paper or acetate and shape it into a cage, twisting and bending the chocolate to create a unique and artistic design. Place the chocolate cage in the refrigerator or freezer to allow it to set completely. Once set, carefully remove the parchment paper or acetate, revealing your creative and visually stunning chocolate cage.
Whether you choose to use a template for a more uniform shape or shape the chocolate cage freehand for a more artistic design, both methods will add a touch of elegance and flair to your desserts. Mastering the art of making chocolate cages takes practice, but with time and patience, you will be able to create stunning and intricate designs that will truly amaze your guests.
Dipping Fruits and Treats in Chocolate
Dipping fruits and treats in chocolate is a classic and delicious way to incorporate chocolate garnishes into your desserts. From strawberries and marshmallows to pretzels and cookies, the options are endless. When it comes to dipping, it is important to choose the right ingredients, melt and temper the chocolate properly, and master the dipping technique.
Choosing the right ingredients is crucial for a successful chocolate-dipped treat. Opt for fruits that are fresh and ripe, such as strawberries, bananas, or pineapple. Make sure the fruits are thoroughly washed and completely dry before dipping them in chocolate to prevent any water from seizing the chocolate. For treats, choose items that have a solid texture and can hold their shape when dipped, such as marshmallows, pretzels, or cookies. The key is to select ingredients that complement the taste and texture of the chocolate, creating a harmonious balance.
Melting and tempering the chocolate is another important step in creating perfectly dipped treats. As mentioned earlier, tempering chocolate stabilizes its cocoa butter crystals, resulting in a glossy and smooth finish. Refer to the previous section on tempering chocolate for detailed instructions on how to properly temper chocolate. Once the chocolate is tempered, it is ready to be used for dipping.
When it comes to the dipping technique, there are a few important tips to keep in mind. Start by holding your chosen fruit or treat with a fork or skewer, ensuring that it is secure and stable. Dip the fruit or treat into the tempered chocolate, ensuring that it is completely coated. Allow any excess chocolate to drip off and gently shake the fruit or treat to remove any excess pooling of chocolate. Place the dipped fruit or treat on a parchment-lined baking sheet or tray to allow the chocolate to set. You can place them in the refrigerator or freezer to speed up the setting time, if desired.
Experiment with different combinations and variations to create unique and delicious chocolate-dipped treats. From the classic combo of strawberries and dark chocolate to the perfect pairing of pretzels and white chocolate, the possibilities are endless. With the right ingredients, proper chocolate tempering, and mastering the dipping technique, you will be able to create beautifully dipped treats that are not only visually appealing but also irresistibly delicious.

Decorating with Chocolate Sauce
Chocolate sauce is a versatile and delicious way to add an elegant finishing touch to your desserts. Whether you drizzle it over cakes, ice cream, or pancakes, or use it to create intricate patterns, chocolate sauce instantly elevates the visual appeal and taste of your creations. There are several drizzling techniques and patterns you can create with chocolate sauce, allowing you to unleash your creativity.
When it comes to drizzling techniques, there are a few popular methods to achieve beautiful and consistent lines. One technique is to use a spoon or a fork to create fine lines of chocolate sauce. Dip the spoon or fork into the chocolate sauce, ensuring that it is well-coated. Hold the spoon or fork above the dessert and move it back and forth in a steady motion, allowing the chocolate sauce to drizzle onto the dessert. This method creates elegant and delicate lines that can be used to decorate cakes, tarts, or pastries.
Another drizzling technique is to use a squeeze bottle or a piping bag fitted with a small round tip. Fill the squeeze bottle or piping bag with chocolate sauce and secure the lid or tightly twist the top of the piping bag. Squeeze the bottle or gently apply pressure to the piping bag, moving it in a controlled manner to create the desired pattern or design. This method allows for more precise control, making it easy to create swirls, loops, or even handwritten letters with the chocolate sauce.
When it comes to creating patterns with chocolate sauce, the possibilities are endless. You can drizzle the sauce in a spiral pattern, crisscrossing lines, or even create intricate lace-like designs. The key is to experiment with different techniques and patterns, allowing your creativity to flow. Don’t be afraid to try new things and have fun with it!
Regardless of the drizzling technique or pattern you choose, decorating with chocolate sauce adds a beautiful and decadent touch to your desserts. The rich and velvety sauce not only enhances the taste of your creations but also creates a visually stunning presentation that will have your guests in awe.
Incorporating Chocolate Garnishes into Baked Goods
Incorporating chocolate garnishes into baked goods takes your sweet treats to a whole new level. From cupcakes and cakes to tarts and pies, adding chocolate garnishes can transform your creations into show-stopping masterpieces. Here are a few ways to incorporate chocolate garnishes into your baked goods.
Cupcakes are the perfect canvas for chocolate garnishes. Start by baking a batch of your favorite cupcakes and allow them to cool completely. Once cooled, you can frost the cupcakes with chocolate buttercream and add a variety of chocolate garnishes on top. Consider using chocolate curls, shavings, or even molded chocolate shapes to decorate your cupcakes. You can also pipe melted and tempered chocolate onto parchment paper in the shape of hearts, flowers, or any other design you desire. Allow the chocolate to set, then carefully peel the shapes off the parchment paper and place them on the frosted cupcakes. These chocolate garnishes not only add a beautiful visual element but also provide an irresistible combination of textures and flavors.
Cakes are another baked good that can benefit from the addition of chocolate garnishes. Whether it’s a simple sheet cake or an elaborate layered creation, chocolate garnishes can take your cake to the next level. Consider using a chocolate transfer sheet to create intricate patterns on the sides of the cake. Simply apply the transfer sheet to the frosted and chilled cake, gently pressing to adhere it. Carefully peel off the transfer sheet to reveal the stunning chocolate pattern. You can also use chocolate curls or shavings to decorate the top and sides of the cake, creating a beautiful and textural contrast. The addition of chocolate garnishes will not only impress your guests but also add additional layers of flavor and texture to your cake.
Tarts and pies can also benefit from the addition of chocolate garnishes. Think beyond the traditional fruit fillings and consider adding a layer of melted and tempered chocolate to the bottom of your tart or pie crust. This “chocolate seal” not only adds a delicious barrier to prevent soggy crusts but also provides a delightful surprise for your taste buds. Once the tart or pie is baked and cooled, you can further enhance the presentation by adding more chocolate garnishes on top. Consider using chocolate shavings, crumbled chocolate cookies, or even chocolate curls to decorate the tart or pie. These chocolate garnishes not only add visual appeal but also provide an extra layer of texture and flavor to your dessert.
Incorporating chocolate garnishes into baked goods allows you to take your creations to new heights. From cupcakes and cakes to tarts and pies, the addition of chocolate garnishes adds visual appeal, texture, and flavor to your sweet treats. Whether you choose to use molded chocolate shapes, chocolate transfer sheets, or simply sprinkle chocolate shavings on top, your baked goods are sure to impress and leave a lasting impression on your guests.
