Have you ever wondered how bakers achieve that perfect flaky texture in their pie crusts? Well, look no further because in this article, you will uncover the secrets behind the art of making flaky pie crust. Whether you’re a baking enthusiast or just someone who loves indulging in delicious homemade pies, mastering this technique will elevate your desserts to a whole new level. Get ready to learn the expert tips and techniques that will have you creating buttery, tender, and irresistibly flaky crusts every time. So grab your apron, gather your ingredients, and let’s get started on this mouthwatering journey to pie perfection.

Ingredients
All-purpose flour
To make a flaky pie crust, you’ll need all-purpose flour. This type of flour is versatile and has a moderate protein content, which helps in creating a tender yet sturdy structure for your crust.
Cold unsalted butter
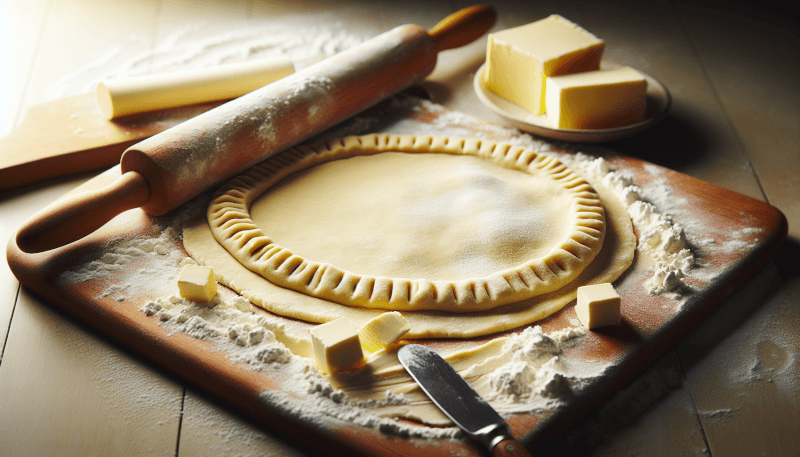
Cold unsalted butter is essential for achieving that light and flaky texture in your pie crust. When little chunks of butter melt in the oven, they create pockets of steam, resulting in a perfectly flaky crust.
Ice water
Ice water is crucial for keeping the butter in the pie dough cold. Using cold water helps prevent the butter from melting too quickly and ensures that the dough remains easy to work with.
Salt
Salt is a key ingredient that enhances the overall flavor of your pie crust. It adds a subtle savory note that complements both sweet and savory fillings.
Granulated sugar
While not necessary for all pie crusts, a hint of granulated sugar can be added to add a touch of sweetness. This is especially useful if you’re making a pie with a sweet filling.
Equipment
Mixing bowl
You’ll need a mixing bowl to combine your ingredients and create the pie dough. Opt for a bowl that is large enough to comfortably mix and handle the dough.
Pastry blender or food processor
A pastry blender or food processor makes it easier to cut the cold butter into the flour to create the desired crumbly texture. It helps in evenly distributing the butter throughout the dough.
Plastic wrap
Plastic wrap is essential for wrapping and chilling your pie dough. It helps prevent the dough from drying out and keeps it fresh while it rests in the refrigerator.
Rolling pin
A rolling pin is a must-have tool for rolling out your pie dough to the desired thickness. Look for a solid, sturdy rolling pin for ease of use.
Pie plate
A pie plate, also known as a pie dish or pie pan, is where your pie crust will be baked. Choose a pie plate that is the right size for your recipe and has a fluted edge for a decorative touch.
Steps
Preparing the dough
To prepare the dough, start by combining the all-purpose flour, salt, and granulated sugar in a mixing bowl. Using a pastry blender or food processor, cut in the cold unsalted butter until the mixture resembles coarse crumbs. Gradually add ice water, a tablespoon at a time, and mix until the dough comes together.
Chilling the dough
Once the dough has come together, shape it into a disc and wrap it tightly in plastic wrap. Refrigerate the dough for at least 1 hour before rolling it out. Chilling the dough allows the butter to firm up again, making it easier to handle and preventing the crust from becoming tough.
Rolling out the dough
To roll out the dough, lightly flour a clean surface and place the chilled dough on it. Use a rolling pin to gently roll the dough from the center outwards, rotating it occasionally to maintain an even thickness. Aim for a thickness of about 1/8 to 1/4 inch, depending on personal preference and the recipe.
Transferring the dough to the pie plate
Once the dough is rolled out, carefully transfer it to the pie plate. Fold the rolled dough in half and then in half again, making it easier to handle. Place the folded dough in the pie plate, unfold it, and gently press it to fit the shape of the plate. Trim any excess dough hanging over the edges.
Trimming and crimping the edges
To trim the edges of the dough, use a sharp knife and trim about 1/2 inch beyond the edge of the pie plate. Next, fold the excess dough under itself, creating a double layer of dough around the rim. Use your fingers or a fork to crimp the edges, giving it a decorative finish.
Tips for Success
Keep ingredients cold
Maintaining cold ingredients throughout the process is crucial in achieving a flaky pie crust. Cold butter creates steam pockets when baking, resulting in a light and airy crust. Make sure to refrigerate the butter and only use ice-cold water.
Avoid overworking the dough
Overworking the dough can lead to a tough and dense pie crust. Mix the ingredients just until they come together, and resist the urge to knead or excessively handle the dough. The goal is to create a crumbly texture, not a smooth and elastic one.
Add water sparingly
When adding water to the dough, do so sparingly. The amount of water required may vary depending on the humidity of your environment and the moisture content of the flour. Add the water gradually, tablespoon by tablespoon, until the dough comes together without being too sticky or dry.
Use a light touch when rolling out the dough
When rolling out the dough, use a light touch to avoid overworking it and incorporating excess flour. Excess flour can make the crust tough and dry. Try to maintain a consistent thickness throughout by regularly rotating the dough and taking breaks to let it rest if needed.
Prevent shrinking during baking
To prevent the crust from shrinking during baking, make sure to gently press the dough into the pie plate without stretching it. Shrinking can also be minimized by chilling the crust before baking and filling the pie while the dough is still cold.

Variations
Whole wheat pie crust
For a healthier twist, you can substitute part or all of the all-purpose flour with whole wheat flour. Whole wheat adds a nutty flavor and extra fiber to your pie crust, making it a wholesome choice.
Gluten-free pie crust
If you follow a gluten-free diet, you can make a pie crust using a gluten-free all-purpose flour blend. Look for a flour blend that is specifically formulated for baking to ensure a great texture and taste.
Savory pie crust
For savory pies and quiches, consider adding herbs or spices to your pie crust. Common additions include dried herbs like thyme or rosemary, ground black pepper, or grated cheese. These additions will add a delightful savory flavor to your crust.
Troubleshooting
Tough crust
If your pie crust turns out tough, it may be due to overworking the dough or not using enough fat. Remember to handle the dough gently, avoiding excessive kneading, and make sure to use an adequate amount of cold butter.
Soggy bottom crust
A soggy bottom crust can be a result of not properly preheating your oven, insufficient baking time, or excess moisture from the filling. To avoid a soggy crust, preheat your oven fully, blind bake the crust before adding the filling, and consider using a pie bird or vent holes to allow steam to escape.
Shrinking crust
A crust that shrinks during baking can happen if the dough is not properly chilled before baking, the crust is stretched when placed in the pie plate, or the oven temperature is too high. Ensure that your dough is thoroughly chilled, handle it carefully during transfer, and check that your oven temperature is accurate.
Uneven browning
If your pie crust browns unevenly, it could be due to hot spots in your oven or the pie plate’s material. To promote even browning, consider rotating your pie halfway through baking, using a glass or ceramic pie plate, or placing the pie on a preheated baking stone.

Frequently Asked Questions
Can I use salted butter instead of unsalted?
While you can use salted butter, it’s generally recommended to use unsalted butter in your pie crust. This gives you better control over the amount of salt in the recipe. If using salted butter, adjust the salt in the recipe accordingly.
Can I make the crust ahead of time?
Yes, you can make the pie crust ahead of time. After preparing the dough, wrap it tightly in plastic wrap and refrigerate for up to 3 days. You can also freeze the dough for up to a month. Thaw the dough in the refrigerator before using.
Can I freeze the dough?
Yes, you can freeze pie dough for later use. After preparing the dough, shape it into a disc and wrap it tightly in plastic wrap. Place it in a freezer-safe bag and freeze for up to a month. Thaw the dough in the refrigerator before rolling it out.
Can I use a different type of flour?
While all-purpose flour is the go-to choice for most pie crusts, you can experiment with different flours for a unique flavor. Whole wheat flour, spelt flour, or even almond flour can be used as substitutes. Keep in mind that different flours may require adjustments in the proportions and handling of the dough.
Can I make a vegan pie crust?
Yes, you can make a vegan pie crust by substituting the cold unsalted butter with chilled vegan butter or coconut oil. Instead of ice water, use ice-cold plant-based milk or water. The process and proportions remain similar; the key is to keep the ingredients and dough cold.
Conclusion
Mastering the art of making a flaky pie crust takes practice, but with the right ingredients and techniques, you can create a crust that will leave everyone wanting seconds. Remember to keep your ingredients cold, handle the dough gently, and don’t be afraid to experiment with different variations. Whether you’re baking a sweet or savory pie, a homemade flaky crust will elevate your dish to another level. So roll up your sleeves, put on your apron, and get ready to create pie perfection!

