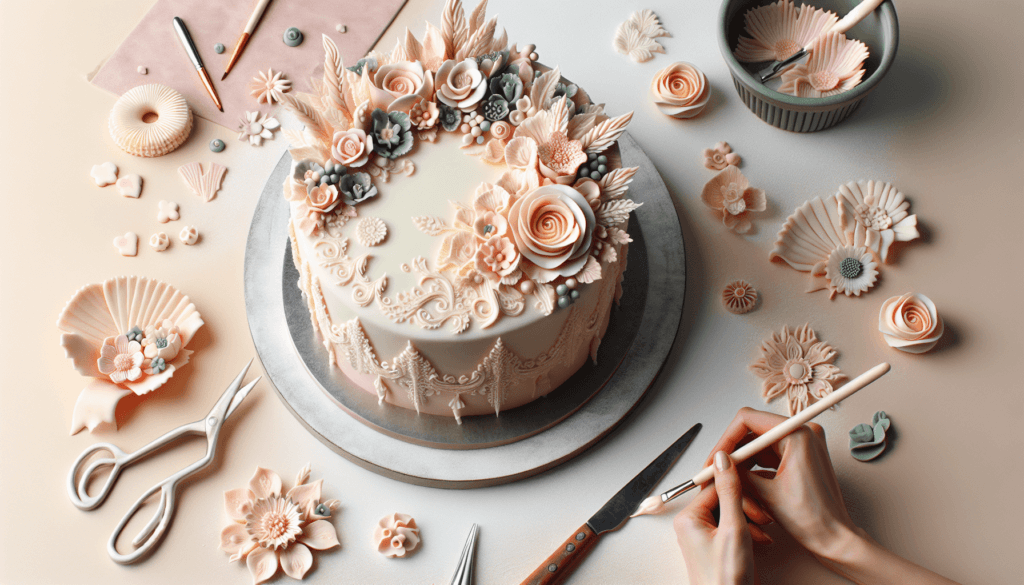
Imagine being able to create stunning cakes that look like they belong in a professional bakery. With the “Ultimate Guide to Cake Decorating Techniques,” you’ll learn all the skills and tricks of the trade to turn any ordinary cake into a work of art. This comprehensive guide covers everything from basic techniques like smoothing icing and creating borders, to more advanced designs such as piping intricate flowers and sculpting fondant decorations. Whether you’re a beginner or an experienced baker, this guide will take your cake decorating skills to the next level and have you wowing friends and family with your delicious creations. Get ready to unleash your inner artist and astound everyone with your cake decorating prowess.
Buttercream Frosting Techniques
Spreading
When it comes to frosting a cake with buttercream, the spreading technique is one of the most basic and versatile. To achieve a smooth and even finish, start by applying a thin layer of buttercream around the sides and top of the cake. Use a spatula to spread the frosting in a back and forth motion, working from the center to the edges. Once the first layer is applied, you can add more buttercream as needed to fill in any gaps or uneven areas. Remember to keep the spatula clean and regularly scrape off excess frosting for a polished look.
Piping
Piping is a fantastic technique for creating intricate designs and adding decorative elements to your cakes. With a piping bag and various tips, you can achieve a wide range of shapes and patterns. Start by attaching your chosen piping tip to the bag and filling it with buttercream frosting. Hold the bag at a 45-degree angle and apply steady pressure to create the desired design. Experiment with different tips to create rosettes, stars, and even writing.
Stenciling
Stenciling is a great way to add texture and patterns to your buttercream frosting. To begin, secure a stencil onto the surface of the cake using tape or magnets. Once in position, use a spatula or a buttercream scraper to spread a thin layer of frosting over the stencil. Carefully remove the stencil to reveal the decorative pattern underneath. This technique is perfect for creating elegant lace or geometric designs on your cakes.
Ruffle
The ruffle technique adds a touch of elegance and dimension to your cake. To create ruffles, start by applying a thin layer of buttercream frosting around the sides of the cake. Next, use a small offset spatula or piping bag fitted with a petal tip to create small, overlapping strokes along the edge of the cake. Work your way around the entire cake, gradually building up the layers of ruffles. The result is a beautiful, textured finish that adds a unique flair to your cake design.
Texture
Creating texture with buttercream frosting can elevate the visual appeal of your cake. There are various ways to achieve texture, such as using a textured scraper, comb, or even a simple fork. To add texture, apply a generous amount of buttercream to the cake and use the selected tool to create your desired design. This technique works well for rustic or themed cakes, adding depth and visual interest to the overall look.
Fondant Techniques
Covering a Cake
Covering a cake with fondant gives it a smooth, polished appearance. To begin, roll out your fondant into a thin, even layer on a clean surface dusted with powdered sugar or cornstarch. Gently lift the fondant and carefully drape it over the cake, starting from the top and working your way down the sides. Smooth out any wrinkles or air bubbles using a fondant smoother or your hands, starting from the center and moving towards the edges. Trim off any excess fondant using a sharp knife for a clean finish.
Draping
Draping fondant is a technique often used to create elegant and flowing designs on cakes. To achieve this effect, roll out a large piece of fondant and drape it over your hand or an object to create folds and waves. Carefully transfer the draped fondant onto the cake, positioning it to create the desired effect. Smooth out any wrinkles or creases as you go, using a fondant smoother or your hands. This technique is great for creating visually stunning cakes for special occasions.
Embossing
Embossing fondant allows you to add intricate patterns and designs to your cakes. There are various embossing tools available, such as rollers, stamps, and mats. To emboss fondant, simply roll the chosen tool over the surface of the fondant, applying even pressure. This will transfer the design onto the fondant, creating a visually appealing texture. Embossed fondant can be used to cover the entire cake or as decorative accents.
Sculpting
Sculpting fondant is a technique that lets you create three-dimensional shapes and figures. With a little creativity and patience, you can sculpt animals, flowers, and even people using fondant. Start by kneading the fondant to soften it and make it pliable. Then, shape and mold the fondant into the desired form using your hands or small sculpting tools. This technique requires practice and precision, but the results can be truly impressive.
Painting
Painting on fondant allows you to add intricate details and vibrant colors to your cake. Using food-safe gel or liquid food coloring mixed with a clear alcohol or vodka, create a paint-like consistency. Using a fine brush, carefully paint your desired design onto the fondant. This technique gives you the freedom to add personalized touches to your cakes, whether it’s delicate flowers or intricate patterns.
Royal Icing Techniques
Piping Borders
Piping borders with royal icing is a classic cake decorating technique that adds a finishing touch to your creations. To pipe borders, fill a piping bag fitted with a small round tip with royal icing. Apply slight pressure to the bag, starting from one corner and moving in a steady motion to create the desired border shape. Practice different border designs such as scallops, dots, or ropes to enhance the overall look of your cake.
Flooding
Flooding is a technique often used in cookie decorating, but it can also be applied to cakes. To achieve a smooth and glossy finish, start by outlining the area you want to flood using a thicker consistency of royal icing. Once the outline has dried, thin down the royal icing with water to create a flooding consistency. Fill the outlined area with the thinned icing, using a toothpick or a small spatula to spread it evenly. This technique is perfect for creating beautifully decorated cookies or intricate patterns on cakes.
Lace Designs
Creating lace designs with royal icing can add an elegant and delicate touch to your cakes. Using a fine piping tip, pipe intricate lace patterns onto a piece of parchment paper or a lace mat. Allow the lace to dry completely before carefully removing it from the paper or mat. These lace designs can then be placed on the cake, adhering them with a small amount of royal icing or edible glue. Lace designs are perfect for wedding cakes or cakes with a vintage-inspired theme.
Stringwork
Stringwork is a technique that involves piping delicate strings or threads of royal icing onto a cake. Start by piping a decorative outline or framework onto the cake, using a slightly thicker consistency of royal icing. Allow it to dry before piping the strings inside the framework, creating a crisscross pattern. This technique requires a steady hand and patience, but the intricate and delicate designs it creates make it worth the effort.
Filigree
Filigree is an intricate and ornamental decorative technique that can be achieved using royal icing. To create filigree designs, start by piping thin lines or swirls onto a piece of parchment paper. Allow the designs to dry completely before carefully removing them from the paper. These delicate royal icing pieces can then be attached to the cake using a small amount of royal icing or edible glue. Filigree adds a touch of elegance and sophistication to any cake design.
Gum Paste Techniques
Flower Making
Creating lifelike flowers with gum paste allows you to add a beautiful and realistic element to your cake designs. Start by kneading the gum paste until it is pliable and then roll it out thinly using a rolling pin. Cut out petals, leaves, or other desired shapes using flower cutters or templates. Shape the petals and leaves using foam pads, ball tools, or other shaping tools to create dimension and realistic details. Allow the gum paste flowers to dry completely before attaching them to your cake using royal icing or edible glue.
Modeling Figures
Gum paste is an ideal medium for creating three-dimensional figures and characters for cake toppers. Begin by kneading the gum paste to soften it and make it pliable. Then, shape and mold the gum paste to build the figure, using tools such as toothpicks or modeling tools to add details and texture. Allow the gum paste figure to dry completely before carefully attaching it to your cake. Whether you want to create a cute animal or a personalized cake topper, gum paste is the perfect material for bringing your ideas to life.
Ruffles and Pleats
Adding ruffles and pleats with gum paste can instantly elevate the visual appeal of your cake. To create ruffles, roll out the gum paste and use a frill cutter to create the desired shape. Use a ball tool or similar tool to thin and ruffle the edges of the gum paste, creating a delicate and textured effect. Similar to ruffles, pleats can be created by folding and manipulating the gum paste into desired shapes. These decorative elements can be attached to the cake using royal icing or edible glue.
Bow Making
Gum paste bows are a perfect addition to celebratory cakes or gift-themed designs. Begin by rolling out the gum paste into a thin, even layer using a rolling pin. Cut out rectangular strips of gum paste that will form the loops and tails of the bow. Fold and shape the gum paste strips to create the loops and tails, using edible glue or royal icing to hold them together. Attach the bow to the cake using royal icing or edible glue, and allow it to dry completely. Gum paste bows are a beautiful and elegant addition to any cake design.
Lace and Filigree
Gum paste can be used to create delicate lace and filigree designs that add a touch of sophistication to your cakes. Roll out the gum paste into a thin, even layer and use lace molds or templates to create intricate lace patterns. Allow the lace to dry completely before carefully placing it on the cake. Gum paste lace can be attached using royal icing or edible glue. This technique is perfect for vintage-inspired or formal cakes that require intricate and ornate elements.

Airbrushing Techniques
Basic Airbrushing
Airbrushing is a versatile technique that allows you to add color, depth, and shading to your cakes. Using an airbrush machine and food-safe airbrush colors, you can achieve a smooth and even application of color. Start by selecting the desired colors and thinning them down with a food-safe thinner or vodka. Practice your technique on a test surface before applying the airbrush color to your cake. Start with light, even coats, gradually building up the color and intensity as needed. Airbrushing is excellent for creating vibrant ombre effects, smooth gradients, or adding subtle shadows to your cake designs.
Stenciling
Stenciling with an airbrush is a fantastic way to add intricate patterns and designs to your cakes. Begin by securing the stencil onto the cake using tape or magnets. Load your airbrush with the desired color and lightly spray over the stencil, making sure to hold the airbrush at a consistent distance for an even application. Carefully remove the stencil to reveal the intricate design underneath. Stenciling is a versatile technique that can be used to create elegant lace patterns, geometric designs, or even custom portraits on your cakes.
Ombre Effects
Ombre effects are a popular trend in cake decorating, adding a beautiful gradient of color to your designs. To achieve an ombre effect with an airbrush, start by selecting a range of colors that seamlessly blend together. Starting with the lightest color, airbrush the cake with broad strokes, gradually transitioning to the darker colors. Blend the colors together using overlapping strokes until you achieve a smooth and gradual transition from light to dark. Ombre effects are visually stunning and can be customized to match any color scheme or theme.
Texturing
Airbrushing can also be used to add texture and depth to your cakes. By using stencils or freehand techniques, you can create a wide range of textures, such as wood grain, marble, or fabric. Experiment with different techniques and colors to achieve the desired effect. Airbrushing textured elements can add visual interest and dimension to your cakes, making them stand out from the crowd.
Multi-color Painting
With an airbrush, you have the flexibility to paint intricate designs or add multiple colors to your cakes. By using different colors in separate airbrush chambers or by masking off areas on the cake, you can achieve elaborate designs with minimal effort. Layering colors and fine-tuning the airbrush pressure allows for a smooth and accurate application. With the right technique and practice, you can create breathtaking landscapes, realistic portraits, or vibrant abstract designs on your cakes.
Stenciling Techniques
Basic Stenciling
Stenciling is a versatile technique that can be done with various mediums, including buttercream, royal icing, or airbrush. To begin basic stenciling, secure the stencil onto the cake using tape or magnets. Fill a piping bag with the desired medium, such as buttercream or royal icing, and apply it evenly over the stencil using a spatula or scraper. Carefully remove the stencil to reveal the pattern or design underneath. This technique is great for adding texture, patterns, or intricate details to your cakes.
Dimensional Stenciling
Dimensional stenciling takes basic stenciling a step further by adding depth and texture to your designs. To achieve this effect, start by applying a thin layer of buttercream or royal icing onto the cake. Place the stencil over the frosted area and press it gently to create an imprint. Remove the stencil and use a piping bag or spatula to fill in the imprinted areas with a contrasting color or medium. This technique adds a three-dimensional element that enhances the overall visual appeal of your cake.
Lace Stenciling
Lace stenciling is a popular technique for creating delicate and intricate lace patterns on cakes. Begin by securing the lace stencil onto the cake using tape or magnets. Apply a thin layer of a medium suitable for stenciling, such as royal icing or buttercream, over the stencil. Carefully remove the stencil to reveal the intricate lace pattern underneath. This technique is perfect for creating elegant and sophisticated designs, particularly for wedding or formal occasion cakes.
Gilding Techniques
Gilding techniques involve adding metallic accents to your cakes, creating a stunning and luxurious look. To create a gilded effect with stencils, secure the stencil onto the cake using tape or magnets. Using either edible gold or silver dust mixed with a clear alcohol or lemon extract, gently brush the dust onto the cake over the stencil. The metallic dust will adhere to the exposed areas, creating a beautiful and eye-catching design. Gilding techniques are perfect for adding a touch of elegance and glamour to your cakes.
Reverse Stenciling
Reverse stenciling is a unique technique that creates a negative space effect on your cakes. Begin by securing the stencil onto the cake using tape or magnets. Apply a layer of medium, such as royal icing or buttercream, over the entire stencil. Carefully remove the stencil, leaving behind a blank space or outline of the design. Fill in the remaining areas with a contrasting color or medium. Reverse stenciling offers a visually striking effect that draws attention to the design and creates a sense of depth on your cake.

Piping Techniques
Borders and Edging
Piping borders and edging is a classic technique that adds a polished finish to your cakes. To pipe borders, fill a piping bag fitted with a small round tip with buttercream, royal icing, or ganache. Hold the bag at a 45-degree angle and apply steady pressure to pipe a continuous line around the edge of the cake. Practice different border designs such as shells, dots, or braids to enhance the overall look of your cake. Piped borders and edging can be simple or intricate, depending on your preference and the style of your cake.
Rosettes
Rosettes are a beautiful and versatile piping technique that adds a touch of elegance to your cakes. To pipe rosettes, fill a piping bag fitted with a star tip with buttercream, royal icing, or ganache. Hold the bag perpendicular to the cake and simply squeeze and release to form a rosette shape. Experiment with different sizes and colors to create visually appealing patterns or arrangements. Piping rosettes allows you to create stunning floral designs or decorative elements on your cakes.
Scrolls and Swirls
Scrolls and swirls are delicate piping techniques that create intricate and decorative patterns on your cakes. Fill a piping bag fitted with a small round or petal tip with buttercream, royal icing, or ganache. Hold the bag at a 45-degree angle and apply steady pressure to pipe intricate scrolls or swirls onto the cake. These designs can be piped as standalone embellishments or as part of a larger pattern. Scrolls and swirls add a touch of elegance and sophistication to any cake design.
Writing
Piping writing onto cakes allows you to personalize your creations and add special messages or sentiments. Fill a piping bag fitted with a small round or script tip with buttercream, royal icing, or ganache. Practice your lettering on a piece of parchment paper or a practice surface before piping directly onto the cake. Start with a light touch and steady hand to pipe letters or words, applying gentle pressure to create consistent lines. Piping writing requires patience and practice, but the end result adds a personal and heartfelt touch to your cakes.
Drop Strings
Drop strings are a delicate and visually stunning piping technique that creates graceful drapes and loops on your cakes. Fill a piping bag fitted with a small round tip with buttercream, royal icing, or ganache. Hold the bag perpendicular to the cake and apply gentle, continuous pressure to pipe a string or a rope of icing. Allow the icing to form loops and drapes as it falls from the bag, creating a beautiful and eye-catching design. Drop strings are perfect for adding a touch of elegance and movement to your cake decorations.
Chocolate Decorations Techniques
Chocolate Shards
Chocolate shards are a versatile and visually striking decoration that can be used in a variety of cake designs. Begin by melting your desired chocolate and spreading it in a thin, even layer onto a clean surface such as a baking sheet or acetate sheet. Allow the chocolate to set partially before breaking it into irregular or geometric shapes. Alternatively, you can create more precise shapes by piping melted chocolate onto a surface or using molds. Chocolate shards can be arranged on cakes to create texture, add height, or provide a visually appealing contrast.
Chocolate Curls
Chocolate curls are a classic and elegant decoration that adds a touch of sophistication to your cakes. To create chocolate curls, start by melting your desired chocolate and spreading it in a thin, even layer onto a clean surface such as a baking sheet or acetate sheet. Allow the chocolate to set partially, but still be pliable. Use a chocolate curler or a vegetable peeler to gently scrape the chocolate, creating beautiful curls. Carefully transfer the curls onto your cake, arranging them in a visually appealing pattern. Chocolate curls are a simple yet impressive decoration that can elevate the overall look of your cake.
Chocolate Transfers
Chocolate transfers are a fantastic way to add intricate designs and patterns to your cakes using colored chocolate. To create chocolate transfers, start by selecting a design or pattern and printing it onto a sheet of acetate or parchment paper using edible ink or food coloring. Melt your desired chocolate and spread a thin, even layer onto the printed design. Once the chocolate has partially set, carefully cut out the transfer using a sharp knife or scissors. Attach the chocolate transfer to your cake using a small amount of melted chocolate or royal icing. Chocolate transfers are perfect for creating custom designs, logos, or intricate patterns on your cakes.
Chocolate Ribbons
Chocolate ribbons are a simple yet effective way to add elegance and visual interest to your cakes. Begin by melting your desired chocolate and pouring it onto a clean surface such as a baking sheet or acetate sheet. Use an offset spatula or a straight edge to spread the chocolate into a thin, even layer. Once the chocolate has partially set, use a knife or a pizza cutter to cut out long, thin strips. Carefully lift the chocolate ribbons and gently wrap them around the cake, creating beautiful loops or bows. Chocolate ribbons are perfect for celebratory cakes or those with a gift-themed design.
Chocolate Collars
Chocolate collars are a visually stunning decoration that can transform a simple cake into a work of art. To create a chocolate collar, start by melting your desired chocolate and pouring it onto a clean surface such as a baking sheet or acetate sheet. Use an offset spatula or a straight edge to spread the chocolate into a thin, even layer. Once the chocolate has partially set, cut out a strip of the desired width and height. Gently wrap the chocolate collar around the cake, allowing it to set and adhere to the sides. Chocolate collars can be used to create a variety of designs and patterns, adding a luxurious and professional touch to your cake.
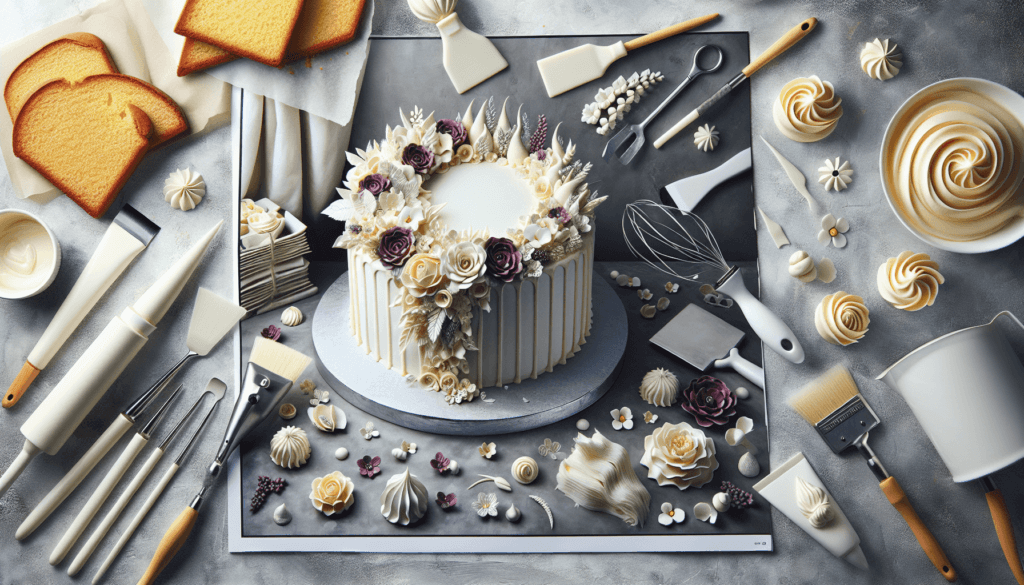
Edible Image Printing Techniques
Preparing the Image
Printing and applying edible images onto cakes allows you to create custom designs, logos, or even photographic representations. Before printing, ensure that the image is appropriate, well-positioned, and of high resolution. Once you have the desired image, adjust the size, colors, or contrast as necessary using image editing software. Remember to mirror the image horizontally if there is any text or a specific orientation. Ensure that the printer you are using is compatible with edible ink cartridges. Finally, print the image onto edible paper or icing sheets, following the manufacturer’s instructions for best results.
Printing on Edible Paper
Printing on edible paper requires a printer that is compatible with edible ink cartridges. Ensure that the printer is clean and free of any regular ink residue to avoid contamination. Load the edible paper or icing sheets into the printer according to the manufacturer’s instructions. Adjust the printer settings to ensure a high-resolution print and select the appropriate paper type. When printing, monitor the process to ensure that the colors are accurate and that the print quality is satisfactory. Allow the printed edible paper to dry completely before handling or applying to the cake.
Applying the Image
Before applying the edible image onto the cake, ensure that the surface is clean and free of any crumbs or debris. Cut out the printed edible image using sharp, clean scissors or a craft knife, keeping as close to the design as possible. Carefully position and place the edible image onto the desired area of the cake. Gently smooth out any air bubbles or wrinkles using a clean, dry finger or a small, soft brush. Take care not to press too hard as this may damage the image. Allow the edible image to set and meld with the frosting or fondant before serving or transporting the cake.
Troubleshooting
While printing and applying edible images can be straightforward, sometimes issues may arise. If the printed image appears faded or lacks color saturation, double-check that the printer settings are correct and that the ink cartridges are properly installed. If the edible paper is not feeding through the printer properly, ensure that it is properly aligned and that there are no obstructions in the printer’s feed mechanism. If the edible image does not adhere to the cake or wrinkles when applied, ensure that the frosting or fondant is not too wet or sticky. Drying the surface slightly before applying the image may help with adhesion.
Storing and Transporting
To store a cake with an edible image, ensure that it is stored in a cool, dry place away from direct sunlight or humidity. Extreme temperatures can affect the appearance and taste of the image. If necessary, you can refrigerate or freeze the cake, but be aware that condensation may cause the colors to bleed or the paper to become soggy when thawed. When transporting a cake with an edible image, place it in a sturdy cake box or a carrier designed specifically for transporting cakes. Take care to secure the cake to prevent shifting or sliding during transportation to maintain the integrity of the edible image.
Sugar Flower Techniques
Making Petals
Creating sugar flowers allows you to add a beautiful and lifelike element to your cake designs. Start by kneading sugar paste or gum paste until pliable and roll it out thinly using a rolling pin. Using flower cutters or templates, cut out petals in various sizes and shapes. Soften the edges of the petals using foam pads, ball tools, or other shaping tools to create a realistic and delicate appearance. Allow the petals to dry partially before assembling the flower.
Assembling the Flower
Assembling sugar flowers requires patience and attention to detail. Start by arranging the petals in a pleasing arrangement, gradually adding layers and building up the flower. Use flower wires or toothpicks to secure the petals together, using edible glue or royal icing to hold them in place. Shape and mold the petals as needed to create a lifelike appearance. Once the flower is assembled, allow it to dry completely before attaching it to your cake.
Coloring and Dusting
Coloring and dusting sugar flowers adds depth, dimension, and a natural appearance. Use food-safe gel or powdered color mixed with clear alcohol or lemon extract to create a paint-like consistency. Using a small brush, apply the color to the edges or centers of the petals, gradually building up layers for a realistic appearance. Dusting the petals with edible dust adds further dimension and enhances the overall look of the flower. Be sure to blend the colors and dust lightly for a subtle and natural effect.
Wiring and Taping
Wiring and taping sugar flowers involves attaching the wired petals and leaves to a floral wire, creating a stable base for arranging and positioning the flower. Start by attaching a floral wire to the back of each petal or leaf using floral tape or a small piece of pre-dried sugar paste. Build up layers by attaching the wired petals and leaves together, securing them with more floral tape. Once the flower is assembled, shape and mold the arrangement as desired. Wiring and taping allow for flexibility and creativity in arranging sugar flowers on your cake.
Creating Flower Arrangements
Creating flower arrangements with sugar flowers adds a touch of elegance and beauty to your cake designs. Start by arranging the sugar flowers in a pleasing composition, taking into consideration the size, shape, and color of each flower. Use floral tape or royal icing to secure the flowers to the cake, ensuring that they are securely positioned. Add foliage, filler flowers, or other decorative elements to enhance the arrangement. Sugar flower arrangements can be simple or elaborate, depending on your preference and the overall style of your cake.
In conclusion, cake decorating techniques offer endless possibilities for creating beautiful and stunning designs. Whether you prefer the versatility of buttercream frosting, the elegance of fondant, the intricacy of royal icing, the flexibility of gum paste, the precision of piping, the richness of chocolate decorations, the uniqueness of airbrushing, the creativity of stenciling, the personal touch of edible image printing, or the lifelike beauty of sugar flowers, there is a technique that will suit your style and elevate your cakes to new heights. With a little practice, experimentation, and creativity, you can master these techniques and create cakes that are truly works of art. So, grab your piping bag, brush, or airbrush, and let your imagination run wild as you bring your cake decorating skills to the next level!
